After acquiring your first 3d printer, it’s important to follow a few essential steps before diving into your first print. These tasks typically include leveling the bed, adjusting the nozzle height, calibrating the E-Steps, and fine-tuning nozzle and bed temperatures. While the initial settings from the manufacturer may be close, achieving precision in these areas can greatly impact the quality of your prints. Various online resources such as websites and YouTube tutorials offer comprehensive guides on these tasks, making it easy to get started and ensure successful prints.
- Physically check dimensions: An aspect that is frequently disregarded is the physical build quality of the 3D printer. Issues stemming from defects in the manufacturing process or assembly can hinder the proper leveling of the bed. A simple way to identify this is to select a fixed point on the frame of the printer and use a ruler to measure multiple points, aiming for a “close” alignment. While perfection is not necessary, this method helps identify any significant deviations from the expected tolerances. Some areas to look for if the measurements are off is how square the frame is. This video goes over the details of why a square frame is important. The video is about building a frame from scratch but it applies here as well and is good information to base your evaluation of a prebuilt on.
- To level the bed, I recommend to initially use a manual process. This ensures that you are in close alignment before relying on the auto bed feature to compensate for significant variations in the physical build. Start by loosening the screws for bed leveling just enough to prevent them from falling out. This prevents the risk of bottoming out a corner of the bed when adjusting. The common method involves homing the hot end and then using an A4 sheet of paper to each corner, adjusting the bed until there is slight friction on the paper. This process should be repeated for each corner. Alternatively, a feeler gauge (link provided) with a 0.07mm thickness can be used for more precision. The key objective is to ensure that the distance from the bed to the nozzle tip is uniform across the bed, serving as the basis for all other adjustments on the printer. Understanding and mastering this concept may take time, but it is crucial for successful printing results.
- Nozzle height is the next big step in the start of 3d printing. Most people will tell you to print a benchy first. This is a good choice but I believe there is a better first print. A simply 120mm x 120mm x .25mm square. What this does is lets you visually inspect the first layer and even adjust it as it is printing (more on this in another article).

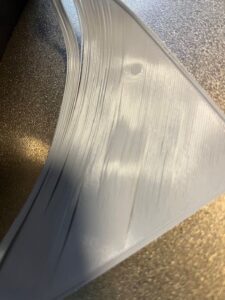
Bad Frist Layer Example (nozzle to far)

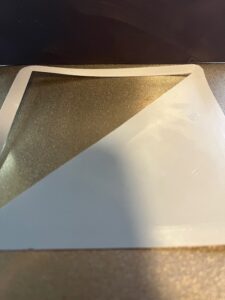
Good First Layer

Both of these examples were pulled from the bed and physically inspected. You should be able to see the lines between the rows but they should not separate. Bumps in the surface indicate that the nozzle is too close. This comes from the nozzle backing up and then overflowing onto the surface.
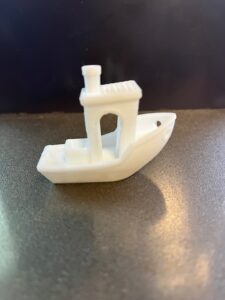
4. Once your first layer is ready then Benchy, Benchy, Benchy. Printing the Benchy is gives you important insight into how the printer will perform. The better the benchy the better your overall prints will be.

0 Comments